

How to Remove Limescale from a Kettle
Before you reach for the vinegar, check your kettle's manual, because a number of manufacturers specifically advise against it. Acetic acid attacks the rubber seals and any exposed aluminum, and in a plastic kettle the smell can linger through five rinses. Citric acid dissolves the same calcium carbonate without either problem, which is why it is what most manuals recommend. Limescale is a chemical deposit rather than dirt, so the whole job is choosing the right acid and giving it time. Here is each method with exact quantities, how long to actually leave it, and the part of the kettle that re-deposits scale into the water the day after you clean it.
Jump to a section
- What you'll need
- Step-by-step
- Why limescale forms in kettles and what it does to performance
- Check what your kettle is made of before choosing an acid
- Take the spout filter out first
- The white vinegar descaling method
- Lemon juice as a fresh-smelling natural alternative
- Citric acid powder for stubborn and long-neglected buildup
- Pro tips
- FAQ
What You'll Need
Step-by-Step Instructions
Why limescale forms in kettles and what it does to performance
Limescale is the hard, chalky white deposit left behind when water containing dissolved calcium and magnesium minerals is heated. As water boils, the dissolved minerals precipitate out of solution and bond to the inner surfaces of the kettle, the heating element or base plate, and the walls of the chamber. Over time, these deposits build up into a thick, rough layer that is insoluble in plain water and impossible to remove by rinsing alone. The problem is not just cosmetic. A limescale-coated heating element has to work harder to transfer heat through the insulating mineral layer, which increases electricity use and slows boiling. Flakes also break off and float into your drinks, adding a metallic, bitter edge to tea and coffee. In hard water areas, a kettle used daily can accumulate a visible crust within two to four weeks. Understanding that limescale is a chemical deposit rather than a dirt buildup is the key to choosing the right removal method: you need an acid to dissolve it, not a scrub to remove it. That single fact is also why scrubbing does damage, since it scratches without removing much.
Check what your kettle is made of before choosing an acid
The method that suits a stainless steel kettle is not automatically the right one for glass or plastic, and this is the step most articles skip entirely. Stainless interiors tolerate all three acids well and are the most forgiving. Glass is equally tolerant but shows every remaining speck, so expect to need a second pass for cosmetic reasons rather than functional ones. Plastic interiors are the fussy case: they hold smells, which is why a vinegar treatment in a plastic kettle can still be detectable after three rinse boils, and citric acid is the better choice there for that reason alone. Then there are the parts that are not the interior at all. Rubber seals around the lid and the water gauge, and any exposed aluminum, are what manufacturers have in mind when their manuals warn against vinegar, because acetic acid degrades both over repeated use. Check the manual before your first descale, not after. If yours specifies a descaler and you would rather not buy one, citric acid is usually the same active ingredient at a fraction of the price.
Take the spout filter out first
Most electric kettles have a small mesh filter clipped inside the spout, and it is the single most overlooked part of this job. Its whole purpose is to catch scale flakes before they reach your cup, which means it collects more scale per square centimetre than anything else in the kettle, and a descaling treatment that leaves it in place cleans everything except the part actively holding the debris. That is why a kettle can produce white flakes again the morning after a thorough descale. Look inside the spout, usually behind the lid opening, and most filters either pull straight up or unclip with light thumb pressure. Drop it into a cup with 100 ml of the same descaling solution you are using in the kettle and leave it for the same soak time. Afterward, brush it with an old toothbrush under running water, checking the mesh from both sides against the light. If the mesh is torn or the frame has cracked, replacement filters are inexpensive and model specific.
The white vinegar descaling method
White distilled vinegar is the most accessible descaler in any kitchen. The acetic acid reacts with calcium carbonate, the primary compound in limescale, breaking it into water-soluble calcium acetate that rinses away. Fill to the halfway mark with equal parts vinegar and water, which in a standard 1.7 litre kettle means roughly 400 ml of each. Dilution matters: undiluted vinegar leaves a far more persistent aftertaste and offers no extra descaling power, since the acid is already strong enough at half concentration. Bring the solution to a full boil, switch off, and leave it for 60 minutes, or 120 minutes for buildup that has accumulated over several months. You will see scale visibly loosening and small chunks detaching during the soak. Pour it out and wipe the interior with a non-abrasive sponge. Most scale at this point needs almost no pressure, because the acid has already broken the mineral bond. Pay particular attention to the base plate, where concentration is always highest. If a stubborn ring remains at the waterline, that is the spot to treat directly rather than repeating the whole cycle.
Lemon juice as a fresh-smelling natural alternative
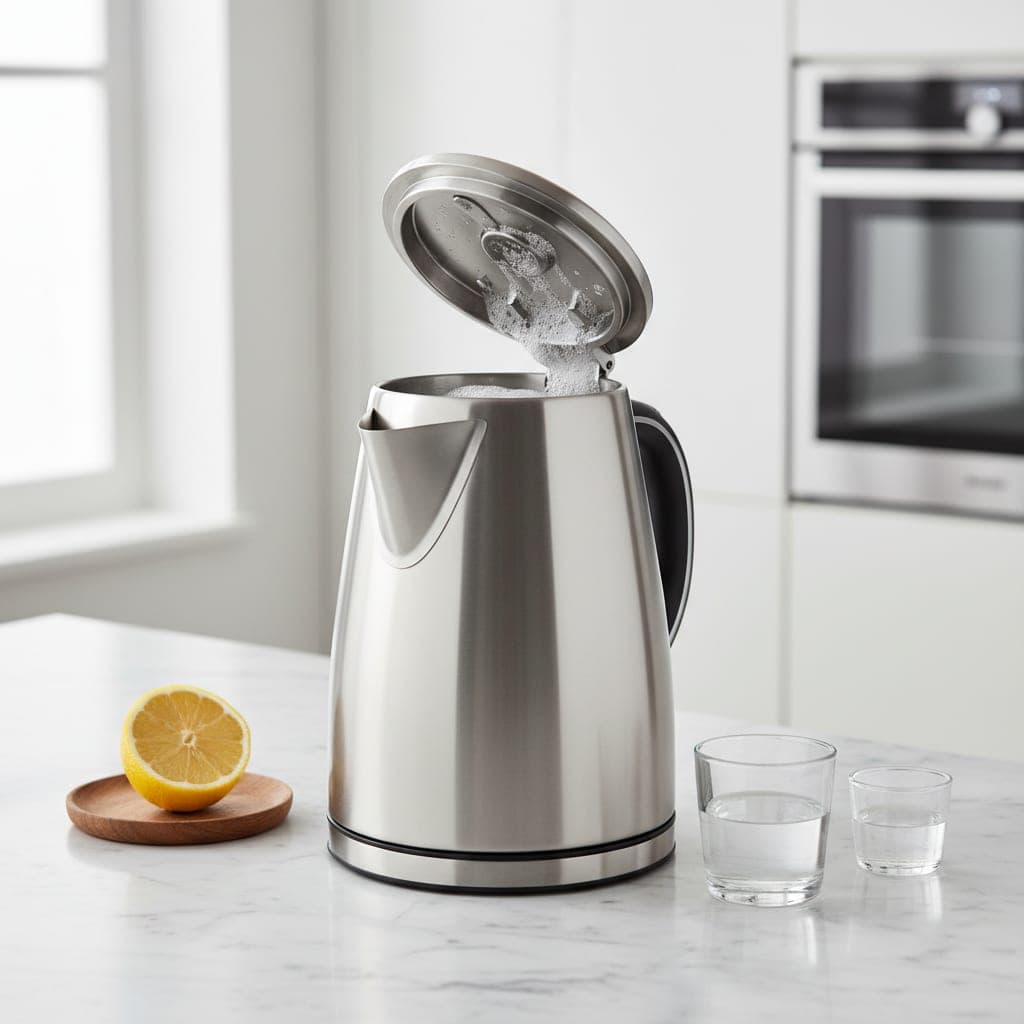
Freshly squeezed lemon juice contains citric acid at a concentration strong enough to dissolve moderate limescale, and it leaves no chemical aftertaste once rinsed. Fill the kettle halfway with water and add the juice of two full lemons, which is roughly 60 to 80 ml, squeezing them directly in. Drop the spent halves in as well for additional contact. Bring to a full boil, switch off, and leave for 30 minutes. Lemon juice is weaker than white vinegar, so it is the gentler option for kettles with plastic interiors or delicate components, and the oil in the peel adds a light degreasing effect around the spout and lid. After soaking, pour out, wipe the interior, and rinse with two full boils of clean water. Where lemon earns its place is routine maintenance rather than rescue work: it descales a kettle that is kept on top of, it needs fewer rinse cycles than vinegar before the taste is neutral, and the kitchen smells better while it works. On genuinely thick scale it will disappoint, and that is the moment to reach for citric acid instead.
Citric acid powder for stubborn and long-neglected buildup
For kettles that have not been descaled in six months or more, where the scale has built into a hard layer that shrugs off a vinegar soak, food-grade citric acid powder is the most effective option available without buying a proprietary product. It is more concentrated than both vinegar and fresh lemon juice and will usually clear heavy deposits in one treatment. Dissolve 15 to 30 g, which is one to two level tablespoons, in a full kettle of water, boil, then leave it 30 minutes. The fizzing on the surface of the deposits is the acid reacting with the calcium carbonate, and the reaction is vigorous enough that chunks which would have needed scrubbing after a vinegar soak simply detach and float free. Pour out carefully, since the solution will contain scale debris, and rinse three times with fresh boiling water. Citric acid is sold in the baking aisle of most supermarkets, is food safe, and is the active ingredient in many commercial descaling sachets at a fraction of the price. It is also the acid to choose for plastic interiors, which hold the smell of vinegar.
Cleaning the spout, lid, and exterior surfaces
While the solution soaks inside, clean the exterior, the spout and the underside of the lid. The spout accumulates deposits on its interior walls and at the lip, which makes the pour go uneven and leaves mineral residue running down the outside. Dip an old soft toothbrush in the descaling solution and scrub as far into the spout as it reaches, now that the filter is out and soaking separately. For the underside of the lid, which collects steam deposits and condensation rings, wipe with a cloth dampened in the same solution. Stainless exteriors often show water spotting and scale streaks from splashes: wipe with undiluted vinegar on a cloth, then buff dry with microfiber, working along the grain. For glass and plastic exteriors use a diluted solution to avoid any dulling of softer surfaces. Clean the base unit and the counter underneath it too, since mineral runoff leaves rings there, and a wet base unit is worth drying properly before the kettle goes back onto it.
Targeting the heating element and base plate thoroughly
In most modern electric kettles heating happens through a concealed base plate rather than an exposed coil, but in either design the deposits concentrate at the heat source. After pouring out the solution, inspect the base with a flashlight, since the inside of a kettle is dark enough to hide a surprising amount. If white or light gray crust remains, dampen a non-abrasive sponge with undiluted vinegar and press it against the patches, leaving it in contact for a full 5 minutes before wiping. Direct contact at higher concentration dissolves the remaining bonds on those specific spots without another full boil cycle. For exposed coil elements, work vinegar into the crevices between the loops and around the base connections with an old soft toothbrush, where scale forms in shapes a sponge cannot follow. Never use metal tools, abrasive pads or hard plastic scrapers on the element, because scratching creates rough points that scale grips more aggressively on every future boil, which makes the problem permanently worse rather than temporarily better.
When one treatment is not enough
Scale that has been building for a year or more sometimes survives a first pass, and the instinct at that point is to escalate to something physical, which is exactly the wrong move. Repeat the chemistry instead. Run a second citric acid treatment at the stronger end of the range, 30 g per litre, and extend the soak to a full hour rather than 30 minutes. If a patch on the base plate still refuses, treat it directly rather than filling the whole kettle again: soak a folded piece of kitchen paper in undiluted vinegar or a strong citric solution, lay it flat on the patch so it stays in contact, and leave it 20 minutes. A compress holds acid against the deposit far more effectively than a solution that is mostly sitting above it. Two or three rounds will clear almost anything. What tells you to stop is not the scale but the kettle: if the base plate is visibly pitted, if the element has a burnt patch, or if the kettle has started cutting out early, the scale has been there long enough to have caused damage that descaling cannot reverse. At that point a new kettle is cheaper than the electricity a badly scaled one wastes. Between rounds, empty and rinse rather than topping up the old solution, since acid that has already reacted with a kettle full of calcium carbonate is substantially weaker than it was when you poured it in, and reusing it is the commonest reason a second treatment disappoints.
A kettle that is new to you, or has been sitting unused
Two situations deserve a first descale before anything else goes in the kettle. A second-hand kettle carries whatever the previous household's water left behind, and scale from a hard water area can be substantial even when the kettle looks clean from above, since deposits sit on the base plate where you cannot see them without a flashlight. Run a citric acid treatment before the first use rather than after, then two discard boils that go down the sink. The other case is a kettle that has stood unused for weeks, in a holiday home, a spare room, or after a move. Water left standing in a kettle deposits minerals without any heat at all, and a kettle stored with water in it develops a ring at the old waterline plus a stale smell from the damp interior. Empty it, run a descaling treatment, follow with a baking soda cycle for the smell, and check the seal around the lid for any perished rubber while you have the lid open. Storing a kettle empty with the lid propped open avoids the whole problem next time.
The rinsing sequence that prevents aftertaste
Rinsing properly matters as much as the descaling. Acid that is not fully rinsed leaves a sour taste in the next few boils that carries into whatever you make. Fill to the maximum line with fresh water, bring to a full boil, pour out completely, and repeat. Two rinse boils are enough after lemon or citric acid. Vinegar needs three, because it is far more persistent. After the final rinse, open the lid and smell the steam: there should be no detectable vinegar or lemon. If there is, run another full cycle before making a drink. Smelling the poured rinse water works as a second check, and it should be completely neutral. In a plastic kettle, expect this to take one extra cycle beyond whatever a stainless one needs. Rushing this step is the main reason people report an aftertaste from homemade descaling, and the fix costs about 10 minutes.
The baking soda deodorizing step
Even after thorough rinsing, some kettles keep a faint metallic or mineral smell that the limescale had been masking. One baking soda cycle usually settles it. Dissolve a teaspoon in a full kettle of water, boil, leave 15 minutes, pour out, then rinse with one full boil of fresh water. Baking soda neutralizes residual acidity from the descaling treatment and absorbs trace odor compounds from the interior surfaces. It is particularly worth doing on a second-hand kettle where the cleaning history is unknown, or a shared kettle in an office or a house share where the schedule is nobody's job in particular. It also works as a standalone freshening treatment once a month between deeper descaling sessions, and it takes under 20 minutes start to finish.
How often to descale based on your water hardness
Frequency depends almost entirely on the mineral content of your tap water. In soft water areas a daily-use kettle may only need attention every three to four months. In hard water areas the same kettle can need it every two to four weeks before performance and flavor suffer. Your water company publishes hardness figures in its annual quality report, usually on its website, and a cheap test strip will tell you in a minute if you would rather not go looking. There is also a rough home check: shake a few drops of plain liquid soap in a bottle of tap water, and water that struggles to produce lather is hard. As a practical trigger, descale when the kettle takes noticeably longer to boil than when it was new, when you see white specks before it reaches the boil, or when there is a visible coating on the base plate under a flashlight. Those three signs are more reliable than any calendar, because they respond to your actual water and usage. It also helps to know roughly where your supply sits, because the categories are wide. Water is generally described as soft below about 60 mg per litre of calcium carbonate, moderately hard from roughly 60 to 120, hard from about 120 to 180, and very hard above that. Some reports use grains per gallon instead, where one grain is about 17 mg per litre, so a reading of 10 grains is around 170 and firmly in the hard band. The practical translation is simple enough: soft water households can descale quarterly and forget about it, moderately hard means monthly, and anything above 180 means a kettle in daily use will need attention every two to three weeks no matter how carefully it is run. Knowing your number also tells you whether a water filter is worth the money, since the harder the supply, the more descaling it saves you.
Prevention habits that significantly slow limescale buildup
A few habits change how fast scale returns. The most effective is emptying leftover water after each use, because water standing for hours deposits minerals onto the interior even at room temperature, and those thin layers harden into the crust under later boiling. The second is filling only to the amount you need rather than to maximum every time, since fewer litres cycled through means fewer minerals left behind. The largest single change available to anyone in a hard water area is using filtered water, from a jug or an under-sink unit, which removes much of the dissolved calcium and magnesium before it ever reaches the kettle and can move a household from monthly descaling to quarterly. Leaving the lid open between uses helps the interior dry rather than sitting damp. None of this stops scale permanently, because the minerals are in the water supply, but together they stretch the interval and keep the element working at its designed efficiency.
Mistakes that damage kettles or make descaling less effective
Using undiluted vinegar. It leaves an acidic flavor that takes five or more rinse boils to clear and descales no better than a 1:1 mix, since the acid is already strong enough at half strength. Scrubbing the interior with an abrasive pad or steel wool, which is tempting because scale is hard, but which scratches the surface permanently and gives future scale a rougher surface to grip, making every subsequent buildup faster and harder to shift. The acid does the work; a non-abrasive sponge is only there to wipe away what the soak has already loosened. Skipping the rinse cycles and using the kettle straight away, which puts residual acid into your drink. Descaling the interior while ignoring the spout, the lid and especially the spout filter, all of which re-deposit flakes into the clean kettle within a boil or two. And ignoring the manual, which on a number of kettles specifically rules out vinegar because of what it does to the seals over time.
Which method to use
| Method | Effort | Best for | Where it falls short |
|---|---|---|---|
| Citric acid powder, 15 g (1 tbsp) per litre | Boil, then 30 minutes soak | Neglected kettles, thick scale, plastic and glass interiors | Has to be bought in, usually the baking aisle. Overkill for light scale. |
| White vinegar, 1:1 with water | Boil, then 60 minutes soak, 120 for heavy scale | Stainless interiors when you want a result today with what is already in the cupboard | Needs 3 rinse boils. Several manufacturers advise against it because of the seals. |
| Fresh lemon juice, 2 lemons per half kettle | Boil, then 30 minutes soak | Routine monthly maintenance, and anyone sensitive to the vinegar smell | Weaker than the other two. Will not clear months of buildup in one pass. |
| Commercial descaling tablets or sachets | Per packet, usually boil and 20 minutes | Following a manual to the letter, or a kettle still under warranty | Costs several times more per treatment than citric acid, which is often the same active ingredient. |
Pro Tips
- ✓Take the spout filter out and soak it in 100 ml of the same solution. It holds more scale per square centimetre than anything else in the kettle, and leaving it in is why flakes reappear the morning after a descale.
- ✓Use a flashlight to inspect the base plate before deciding you are finished. The inside of a kettle is dark enough to hide a layer you would otherwise leave behind.
- ✓Lemon for monthly maintenance, citric acid for rescue work. Vinegar sits between them and is the one to check your manual about first.
- ✓In a plastic kettle, add one extra rinse boil beyond whatever you would run on stainless. Plastic holds the smell, and this is where most aftertaste complaints come from.
Frequently Asked Questions
How do you remove limescale from a kettle naturally?
Fill halfway with equal parts white vinegar and water, around 400 ml of each in a standard kettle, boil, then leave it to soak for 60 minutes. Pour out, wipe with a non-abrasive sponge, and run three full rinse boils. For a fresh-smelling alternative use the juice of two lemons in half a kettle of water with a 30 minute soak, or 15 g of citric acid per litre for heavy buildup. Take the spout filter out and soak it alongside, whichever method you pick.
How long should you leave vinegar in a kettle?
Sixty minutes after boiling for normal buildup, and up to two hours for scale that has accumulated over several months. The acid keeps working throughout the soak, so longer helps up to a point, but there is little gained past two hours. Do not leave it overnight, particularly in a kettle with rubber seals, since prolonged acid contact is where the damage manufacturers warn about actually happens.
Why does my kettle still have white flakes after descaling?
Almost always the spout filter, the small mesh screen clipped inside the spout. It catches flakes by design, so it holds more scale than anywhere else, and a treatment that leaves it in place cleans everything except the part actively holding the debris. Take it out, soak it in the same solution, and brush it under running water. The other two culprits are the underside of the lid and scale that loosened but was never wiped away, so run one extra rinse boil after wiping.
Is limescale in a kettle harmful?
The calcium and magnesium minerals themselves are not toxic and the amounts that flake into a drink are not a health concern. The practical reasons to remove it are that it insulates the heating element so the kettle uses more electricity and takes longer to boil, it gives drinks a metallic edge, and the rough surface holds moisture and residue between uses in a way that smooth stainless or glass does not.
Can I use citric acid instead of a commercial descaler?
Usually yes, and it is frequently the same active ingredient. Food grade citric acid costs a fraction of the price per treatment, dissolves the same calcium carbonate, and is the better choice in plastic kettles because it does not leave a smell. Use 15 g, about one level tablespoon, per litre of water. The exception is a kettle under warranty whose manual names a specific product, where following the manual is worth more than the saving.
How this guide was made
This vinegar hacks guide was researched, written, edited, and published by Fredler Pierre-Louis. The 15 steps below are built around White distilled vinegar, about 500 ml per treatment, Food grade citric acid powder, or two fresh lemons and Baking soda, one teaspoon, and the quantities and dwell times come from published cleaning-chemistry and manufacturer guidance for those materials, not from a controlled trial we ran ourselves. Where a popular version of this hack does not work, or is risky on a particular surface, this 14 min guide says so.
- Checked against manufacturer and materials guidance for the surfaces named.
- Reviewed by a person for chemical safety and surface compatibility before publication.
- Written to explain why a method works, not just to list steps.
- Corrected whenever a reader reports an error or an edge case we missed.
Read our full editorial policy or learn more about the team behind TryCleaningHacks.
Related Cleaning Guides
Safety Notes
- ⚠Check the manual before using vinegar. Several manufacturers advise against it because acetic acid degrades rubber seals and attacks exposed aluminum over repeated treatments.
- ⚠Never use bleach or a non-food-safe cleaner inside a kettle. Residues transfer to drinks even after rinsing.
- ⚠Let the solution cool before pouring it out. Hot acid solution carrying scale debris can scald, and a disturbed kettle releases steam suddenly.
- ⚠Do not use abrasive pads, steel wool or hard scrapers on the element or interior. Scratches accelerate future scale adhesion and can damage the interior coating.
- ⚠Never run a kettle dry to dislodge scale. Boil-dry protection is a safety cut-out, not an operating mode.
You might also like
How to Clean Almost Anything With Vinegar (8 Methods)
I have cleaned with a single jug of white vinegar for about nine years now, and along the way I ruined a marble windowsill and pitted a cheap chrome faucet learning where it actually belongs. Here are the eight jobs it genuinely does better than the pricey sprays under my sink, with the exact soak times and quantities that made the difference. I am not going to pretend it is magic. It is a weak acid, roughly 5 percent acetic acid and 95 percent water, and once you understand that one fact you can predict where it will shine and where it will let you down. It dissolves mineral scale and cuts light grease beautifully, and it does almost nothing for disinfecting or for baked on carbon. I have organized these from the single best use to the honest warning at the end, and I am blunt about the two places it flat out failed me so you do not repeat my mistakes.
How to Remove Hard Water Stains From Glass, Faucets, and Tiles
I moved into a home with twelve years of untreated hard water stains on shower glass, faucets, and tiles. After testing every popular method on the same heavily mineralized surfaces over six weeks, the ten approaches in this guide are ranked by what actually worked on real long term buildup, not just fresh deposits. The vinegar wrap method removed mineral crust that fifteen minute sprays could not touch, the warm vinegar trick dissolved stains roughly twice as fast as cold vinegar on the same surfaces, and one simple prevention habit reduced new staining by approximately eighty percent in the first month. Here is the exact step by step that restores foggy shower glass, calcified faucets, and stained bathroom tiles to a like new finish, plus the surfaces where vinegar will permanently etch and damage the material instead of cleaning it.